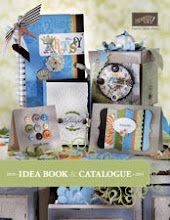
Welcome to another ESAD Blog Hop - this one is focussed on the release of the new 2010-11 Idea Book and the marvellous addition of the Sizziz Big Shot with all its accessories.
What is ESAD?
ESAD stands for Extra Special Australasian Demonstrators and it is an online group just for Australian and New Zealand demonstrators for Stampin’ Up!
We so love what we do and not only do we love to share it with our customers, friends, and wonderful blog visitors but we share our love for what we do with each other as Demonstrators. We run swaps, challenges, tutorials, product know how and cyberstamps and we are always there to help and support each other when its needed.
So if you are a Stampin’ Up! Demonstrator located in Australia or New Zealand then please feel free to click here to join our wonderful group. (Otherwise, you'll have to become a Demonstrator and then join ESAD - it's all great fun! hehehe)
Ok, so my projects are these super cute little bags that I have embossed with different textured embossing dies.
1) Polka Dot Embossing
2) Vintage Wallpaper Embossing plus Ink pad
This piece of cardstock was originally white all over... Did you know you can apply your inkpad directly onto the plastic dies and the ink will transfer to the card whilst you are embossing through the Big Shot. If you would like to know more about this, I'd be happy to demonstrate at a workshop.
Each of these dies are just $15.95
And here's a quick tutorial on how to make your own bag:
Take a piece of card or designer series paper (DSP) measuring 15x15cm, and score at 3cm along the top and bottom 2 edges and 6cm along the other 2 edges
Fold all the score lines
Fold 1 edge down from the centre of the bag to make a triangle shaped crease - this makes the bag fold nicely together. A bone folder comes in handy to get a crisp foldline.
Repeat 3 times and you get a piece of card looking like this
Optional: Run the card/dsp through the Big Shot with your chosen Embossing Die (in this case I've used the Polka Dot). Dont worry about the parts that have been missed - they go inside the bag.
Apply your adhesive to the inside of your bag as shown below and fold the sides in
You should have something looking like this pic now
In a co-ordinating card cut 2 strips the length of the top of your bag and 2cm wide. Score at 1cm along the length of your card strips. Cut 2 pieces of ribbon to make the handles. I've used my Crop-a-dile to punch the holes in my card strips as I can punch 2 pieces of card easily to ensure the handles will match on each side of the bag.
Add some adhesive and thread your ribbon through the holes - 1 piece of ribbon per card strip
Adhere your card strips with ribbon to the top of your bag. You can also add some velcro inside your bag to close it.
These bags are very versatile - I made a large one from some 12" DSP for a friend's b'day and filled it with jewellery - it was a big hit with everyone who saw it! Oh, I must add that I was originally shown how to make these bags with some Designer Series Paper by my sideline Andrea. If you have any queries please ask! :)
Now please continue the blog hop and visit Shirley McAvoy's Blog by clicking here
Or if you're are a little lost, here's all the links:
Nikki Sadler - http://www.inkyart.com.au/
Angela Purdie - http://www.kintakards.webs.com/
Richelle Fletcher - You are here right now! lol :)
Shirley McAvoy - http://stampingelephants.wordpress.com/
Carole Stedman - http://www.carolestamping.com/
Carol-Ann Torrie - http://queen-of-scraps.blogspot.com/
Sherylee Tutt - www.stampinup.net/esuite/home/sherylee/blog
Clare Mcilhatton - http://www.crafty-cow.com/
Andrea Buckland - http://creatingcardswithandrea.blogspot.com/
Susan Joyce - http://www.catsinkcorporated.blogspot.com/
Ann Gerlach - http://www.discover-ink.blogspot.com/
Dani Fender - http://danifender.blogspot.com/
Bron Heslop - http://www.bronheslop.wordpress.com/
Charmaine Black - http://www.l-ink-edtopaper.blogspot.com/
Pauline Bennetts - http://stampinovation.blogspot.com/
Bev Watt - http://stampinovation.blogspot.com/
Vicki Were - http://www.stampinvickistyle.blogspot.com/
Jo Weedon - http://www.scrapandstampin.blogspot.com/
Kim Conway - http://kimconwaycards.blogspot.com/
Jane Norrish - http://www.janenorrish.com/
Jacinta Argent - http://jacintascreations.blogspot.com/
Monique Fielder - http://stamping-with-moni-q.blogspot.com/
Jan McAnulty - http://cardcaperswithjan.wordpress.com/
Happy browsing!! and if you leave a comment on everyone's blog, you need to email Leonie and you will go into the draw for our blog candy giveaway!! And if you do try one of these bags, please pop back and let me know and add a pic if you can! I'd love to see what you've made too!!
Thanks for looking,


Hi Richelle
ReplyDeleteThese little bags are delightful. Will have to make some. Thanks for sharing the tutorial.
Thanks so much for the tutorial!
ReplyDeleteThank you for the fabulous tutorial!
ReplyDeleteThe bag is adorable :D
Richelle these are cute little bags and show beautifully the different effects you can get with the different embossig folders.
ReplyDeleteSuper-cute little bags, and fantastic tutorial, Richelle. Just gorgeous!
ReplyDeleteThese are lovely - I especially like the green and white one. Thanks for the tutorial.
ReplyDeleteyour little handbags are so sweet, clever you!
ReplyDeleteWow, thanks for creating those purse and sharing that tutorial. How generous of you. Can't wait to try them out. Thanks for sharing!
ReplyDeleteJust gorgeous Richelle:) We will all be using paper bags soon they are so beautiful;)
ReplyDeleteHi, what a cute little bag, thanks so much for the tutorial, it was easy to follow
ReplyDeleteI love the look on the green one! Great technique. These are darling!
ReplyDeleteThese are so gorgeous, Richelle, I especially love the green one - thanks for sharing the tutorial!
ReplyDeleteGreat ideas and tutorial, thanks for sharing
ReplyDelete